This article is about creating a web application which has Spring MVC, Spring Data JPA, EclipseLink as JPA solution, Sitemesh decorator pattern, RESTful Web Service. And this all configuration are JavaConfig Annotation based. There is no XML configuration for Spring. Since Spring 3, Java Configuration features are part on Spring framework but it is less explored.
You can download/pull the whole project from this github repository. In this article we will discuss about important configurations.
Since all the configuration are java based, they are devided in differentjava files. We will cover important configuration.
WebInitializer.java
This calss implements WebApplicationInitializer interface. This interface needs to be implemented in Servlet 3.0+ environments in order to configure the ServletContext programmatically as opposed to the traditional web.xml based approach. So your web.xml will not have any servlet declaration.
public class WebInitializer implements WebApplicationInitializer{

	private static org.apache.log4j.Logger log = Logger.getLogger(WebInitializer.class);

	public void onStartup(ServletContext servletContext) throws ServletException {

		// TODO Auto-generated method stub
		log.debug("WebApplicationInitializer started...");
		AnnotationConfigWebApplicationContext rootContext = new AnnotationConfigWebApplicationContext();

		 // Manage the lifecycle of the root application context
	    servletContext.addListener(new ContextLoaderListener(rootContext));
	    servletContext.setInitParameter("contextConfigLocation", "<NONE>");

	    rootContext.register(DBConfig.class);
	    rootContext.register(WebConfig.class);

		rootContext.setServletContext(servletContext);

		log.debug("Starting Dispatcher Servlet.....");
		ServletRegistration.Dynamic servlet = servletContext.addServlet("dispatcher", new DispatcherServlet(rootContext));
		servlet.setLoadOnStartup(1);
		servlet.addMapping("/");
		servlet.setMultipartConfig(new MultipartConfigElement("/img", 1024*1024*5, 1024*1024*5*5, 1024*1024));
		log.debug("Started Dispatcher Servlet.....");

		registerSitemeshFilter(servletContext);

	}

	private void registerSitemeshFilter(ServletContext servletContext){
		log.debug("Registering sitemesh filter....");
		FilterRegistration.Dynamic registration = servletContext.addFilter("sitemesh", new SitemeshConfig());
		registration.addMappingForUrlPatterns(null, true, "/*");
		log.debug("Sitemesh filter Registered....");
	}

}
Using this class ServletContext will be started and all the servlet (DispatcherServlet in this case) and all the filters (Sitemesh filter in this case) will be loaded
DBConfig.Java
Following is DBConfig.java which contains mainly database related configuration and bean initialization.
@Configuration
@EnableTransactionManagement(proxyTargetClass = true)
@EnableJpaRepositories(basePackages={"com.yoursite.repository"}, entityManagerFactoryRef = "em")
@EnableLoadTimeWeaving
public class DBConfig {

	@Value("${jdbc.driverClassName}")
	private String driverClassName;

	@Value("${jdbc.url}")
	private String url;

	@Value("${jdbc.username}")
	private String username;

	@Value("${jdbc.password}")
	private String password;

	@Value("${eclipselink.persistenceUnitName}")
	private String persistenceUnitName;

	private static org.apache.log4j.Logger log = Logger.getLogger(DBConfig.class);

	@Bean()
	public DataSource getDataSource() {
		BoneCPDataSource ds = new BoneCPDataSource();
		log.debug("Driver Name : " + driverClassName);
		try {
			Class.forName(driverClassName);
		} catch (ClassNotFoundException e) {
			// TODO Auto-generated catch block
			e.printStackTrace();
		}
		log.debug("DB Url : " + url);
		ds.setDriverClass(driverClassName);
		ds.setJdbcUrl(url);
		ds.setUsername(username);
		ds.setPassword(password);
		ds.setMaxConnectionsPerPartition(5);
		ds.setMinConnectionsPerPartition(2);
		ds.setAcquireIncrement(2);
		return ds;
	}

	@Bean(name = "em")
	public LocalContainerEntityManagerFactoryBean entityManagerFactoryBean() {
		LocalContainerEntityManagerFactoryBean em = new LocalContainerEntityManagerFactoryBean();
		em.setDataSource(getDataSource());
		em.setJpaDialect(jpaDialect());
		em.setPackagesToScan("com.yoursite.model");
		em.setPersistenceUnitName(persistenceUnitName);
		DatabasePlatform dp = new MySQLPlatform();
		em.setJpaVendorAdapter(getEclipseLinkJpaVendorAdapter());

		//following code will be used for static weaving. Uncomment when creating war.
		/*Map <String, String> propMap = new HashMap<String, String>();
		propMap.put("eclipselink.weaving", "static");
		em.setJpaPropertyMap(propMap);*/

		em.setLoadTimeWeaver(loadTimeWeaver()); //comment this when using static weaving. Mostly in development environment inside eclipse
		return em;
	}

	@Bean
	public EclipseLinkJpaVendorAdapter getEclipseLinkJpaVendorAdapter() {
		EclipseLinkJpaVendorAdapter vendorAdapter = new EclipseLinkJpaVendorAdapter();
		vendorAdapter.setDatabasePlatform("org.eclipse.persistence.platform.database.MySQLPlatform");
		vendorAdapter.setGenerateDdl(false);
		vendorAdapter.setShowSql(true);
		return vendorAdapter;
	}

	@Bean()
	public LoadTimeWeaver loadTimeWeaver() {
	    return new org.springframework.instrument.classloading.InstrumentationLoadTimeWeaver();
	}

	@Bean
	public PlatformTransactionManager transactionManager() {
		JpaTransactionManager transactionManager = new JpaTransactionManager();
		transactionManager.setEntityManagerFactory(entityManagerFactoryBean().getObject());
		return transactionManager;
	}

	@Bean
	public PersistenceExceptionTranslationPostProcessor persistenceExceptionTranslationPostProcessor() {
		return new PersistenceExceptionTranslationPostProcessor();
	}

	@Bean
	public JpaDialect jpaDialect() {
		return new EclipseLinkJpaDialect();
	}
}
@Configuration indicates that a class declares one or more @Bean methods and will be processed by the Spring container to generate bean definitions . @EnableJpaRepositories will enable Spring Data Jpa and you need to place all your repository interfaces under mentioned basePackages. @EnableLoadTimeWeaving is related to weaving of POJO. You can find out more about weaving at this link. For configuring weaving refer point no 6 below in “Steps to run/deploy project”
Also note that @Value annotation will fetch values from application.properties file. So modify database properties as per your database.
WebConfig.java
This java class contains configuration related to web application.
@EnableWebMvc
@Configuration
// Specifies which packages to scan
@ComponentScan("com.yoursite")
@PropertySource(value = "classpath:application.properties")
// Enables Spring's annotation-driven transaction management capability, similar to the support found in Spring's <tx:*> XML namespace
@EnableTransactionManagement(proxyTargetClass=true)
public class WebConfig extends WebMvcConfigurerAdapter{

	@Bean
	public static PropertySourcesPlaceholderConfigurer getPropertySourcesPlaceholderConfigurer() {
		return new PropertySourcesPlaceholderConfigurer();
	}

	@Bean
	public UrlBasedViewResolver setupViewResolver() {
		UrlBasedViewResolver resolver = new UrlBasedViewResolver();
		System.out.println("UrlBasedViewResolver........");
		resolver.setPrefix("/WEB-INF/views/");
		resolver.setSuffix(".jsp");
		resolver.setViewClass(JstlView.class);
		return resolver;
	}

	@Bean
	MultipartResolver multipartResolver() {
		MultipartResolver resolver = new CommonsMultipartResolver();
		return resolver;
	}

	@Override
	public void addResourceHandlers(ResourceHandlerRegistry registry) {
		System.out.println("In Resouce Handler");
	    registry.addResourceHandler("/resources/**").addResourceLocations("/resources/defaultTheme/");
	}

}
In this class, we have specified UrlBasedViewResolver, which will allow direct resolution of symbolic view names (Strings in Controller) to URLs. This means all your JSPs should be created under /WEB-INF/views and it will be processed by JSTL. When you return a string from Controller method, it will be mapped with respective JSP. We have also added MultipartResolver bean for file upload.
SitemeshConfig.java
This class will configure sitemesh.
public class SitemeshConfig extends ConfigurableSiteMeshFilter {

	private static org.apache.log4j.Logger log = Logger.getLogger(SitemeshConfig.class);

	@Override
	protected void applyCustomConfiguration(SiteMeshFilterBuilder builder) {
		builder.addDecoratorPath("/*", "/WEB-INF/decorators/genericdecorator.jsp");
		builder.addTagRuleBundle(new Sm2TagRuleBundle());
		log.debug("Sitemesh Configuration done!");
	}
}
Here we have specified decorator to be used. Decorator jsp is the one which will be applied to all pages in application. Header, footer, navigation, css, scripts etc which is common to all the pages are part of this. This is like template. Refer genericdecorator.jsp of the project for reference.
GreetingController.java
This is REST Controller. Spring provides easy RESTful web services. @RestController will do all the job for you. Using Jackson integration, Rest Controller’s method will parse POJO to JSON and return to client. You can integrate any other JSON framework with spring.
@RestController
public class GreetingController {

	private final PersonService personService;

	@Autowired
	private PersonDataRepository personDataRepository;

	@Autowired
	public GreetingController(PersonService personService) {
		this.personService = personService;
	}

	/*
	 * Returns JSON represents of Person object
	 */
	@RequestMapping("/greeting/{userId}")
	public Person greeting(@PathVariable Long personId) {
		return personDataRepository.getOne(personId);
	}
}
Required tools/technologies
- Eclipse IDE with Maven
- Tomcat 7 or greater
- MySql 5.0 or above
Steps to run/deploy project
- Download project from github.
- Execute yoursite.sql in your MySql database.
- In eclipse, choose file > Import > Existing Maven Project.
- Select the location of pom file of the project you downloaded and click on finish.
- Right Click on Project > Maven > Update Project. This will update the structure of project if needed.
-
For development environment, you need to set up load time weaving of POJOs. For this you need to specify weaver jar using javaagent to your tomcat server. Here we are using Spring Instrument for load time weaving. You can download latest jar from this link. Now open launch configuration of your tomcat server from eclipse (Double click on your tomcat in Servers tab & click on Open launch configuration). Now click on Arguments tab and append following line to VM arguments.
-javaagent:<Path to Spring Instrument jar you downloaded>
For e.g. I downloaded spring-instrument-4.2.3.RELEASE.jar and placed in D drive. Then javaagent argument will be as follow:
-javaagent:D:\spring-instrument-4.2.3.RELEASE.jar
In development environment you should use load time weaving. But when you are preparing war file you should use static weaving. So when creating war comment @EnableLoadTimeWeaving and make changes in entityManagerFactoryBean() method of DBConfig.java as mentioned in comments of method.
- In application.properties, change jdbc.url, jdbc.username, jdbc.password & eclipselink.persistenceUnitName as per your database settings. Also make the same changes in persistence.xml
- Add project to tomcat and start the tomcat.
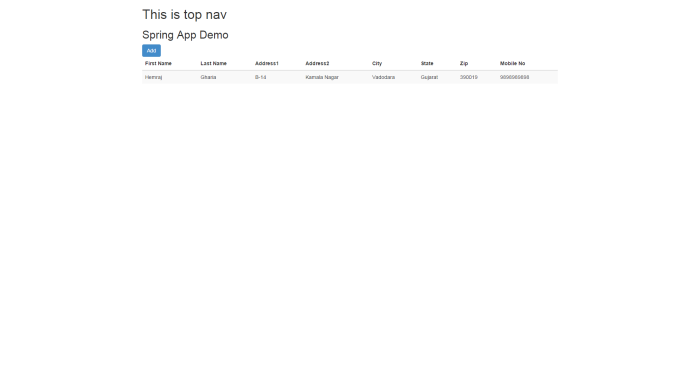
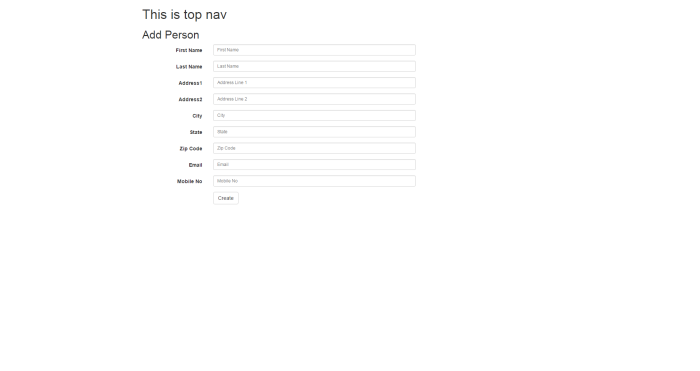
- The project has Person domain class, controller, service & repository. To access on browser, go to http://localhost:8085/yoursite/person?startIndex=0&limit=10. This will open list of person, which initially will be blank. Click on “Add” button to add a new person. Once added it will be listed there. You can edit it.
- You can access one sample REST endpoint at http://localhost:8080/yoursite/greeting/<personId>. Replace “personId” with the added person id.
If you want to develop a web application using this project and want to rename it, then change artifactId, groupId, fileName etc in pom.xml. Also if you want to upgrade spring and other dependencies version, then simply change the properties in pom.xml
If found any difficulty, please contact me on ghariaonline@gmail.com. Share your feedabck. Happy Coding